01 / Create a trip
Start your travel itinerary with a destination
A Holihopper board is a shared home for your trip. Each day has its own column, and each plan becomes a card. Start with one destination, even if you have not worked out the rest of the journey.
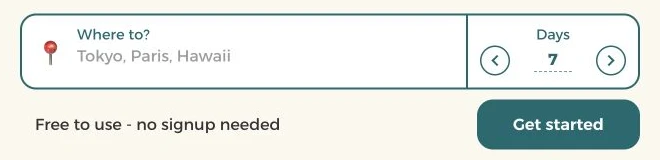
- On the home page, enter your first destination in Where to? and select the matching place from the suggestions.
- Choose the number of days, then select Get started to create your board. You can start without an account.
- Follow the welcome guide or begin adding your own plans. Set your actual travel dates in the board before relying on its calendar.
Good to know Check the country in the destination suggestion. Different places can share the same name.
02 / Stops and dates
Plan several destinations in one trip
Keep a city break, a road trip or a longer multi-destination journey on one board. Each stop has its own destination and date range, so the right activities stay together.
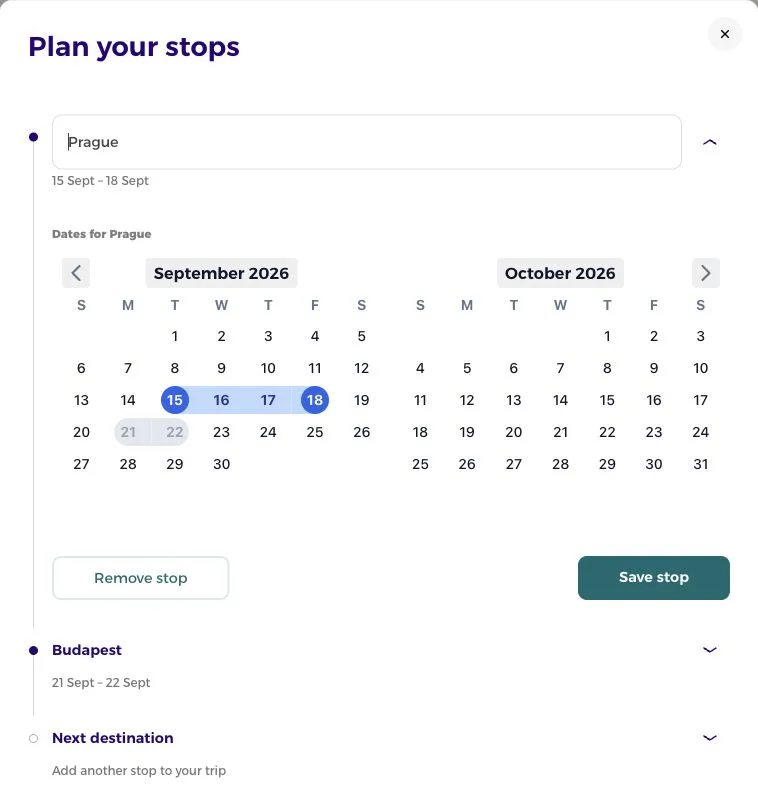
- Use Add stop, the plus button beside your trip dates, to add the next destination and its dates.
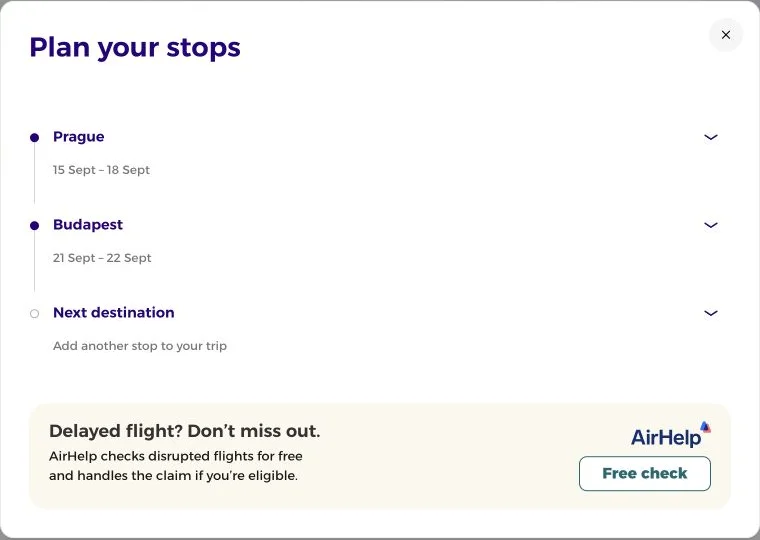
- Select a stop or its day heading to open Plan your stops. Change the destination or date range, then select Save stop.
- Use the stop navigation to jump between destinations. Collapse a stop on the board when you want more room for the next one.
- To remove a stop, open its editor and use Remove stop. Review the confirmation before continuing.
Good to know Dates already used by another stop are unavailable. Review your cards after changing a date range, especially when shortening a stay.
03 / Places and cards
Keep places, bookings and ideas on cards
Use a card for anything that belongs in your day: a hotel check-in, a museum, lunch, a flight or an idea you have not committed to yet.
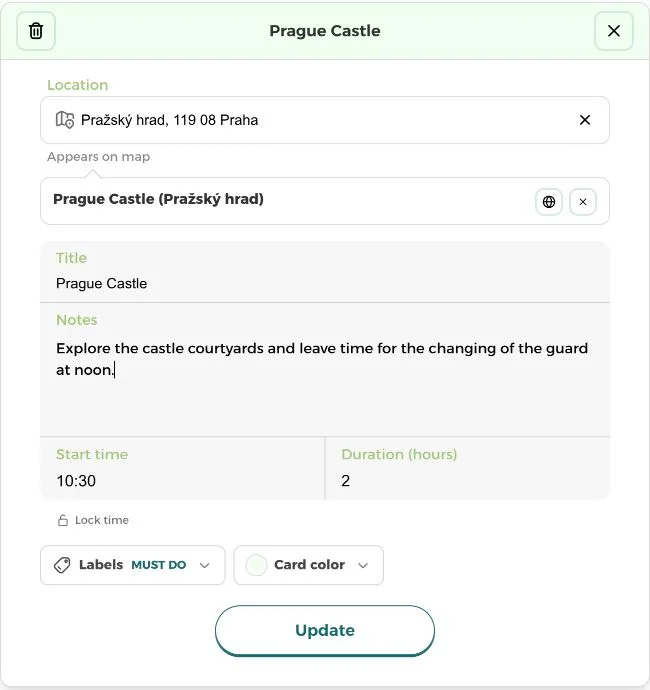
- Select New card under the day you are planning, then open the card to edit it.
- Give it a clear title and add useful notes, such as a meeting point or what to bring.
- Search in Location and select the correct place to put the card on your map. You can also paste a link into the location or title field to save a useful page.
- Set a start time and duration if you know them, then select Update. Open the card again whenever the details change.
Good to know A title alone does not guarantee a map pin. Select a location and check its address. If a link preview is unavailable, keep the useful details in the card notes.
04 / Organize your days
Move plans around until the day feels right
A visual itinerary makes it easier to see a busy morning, a free afternoon or an activity that belongs on another day. You can rearrange the plan as you go.
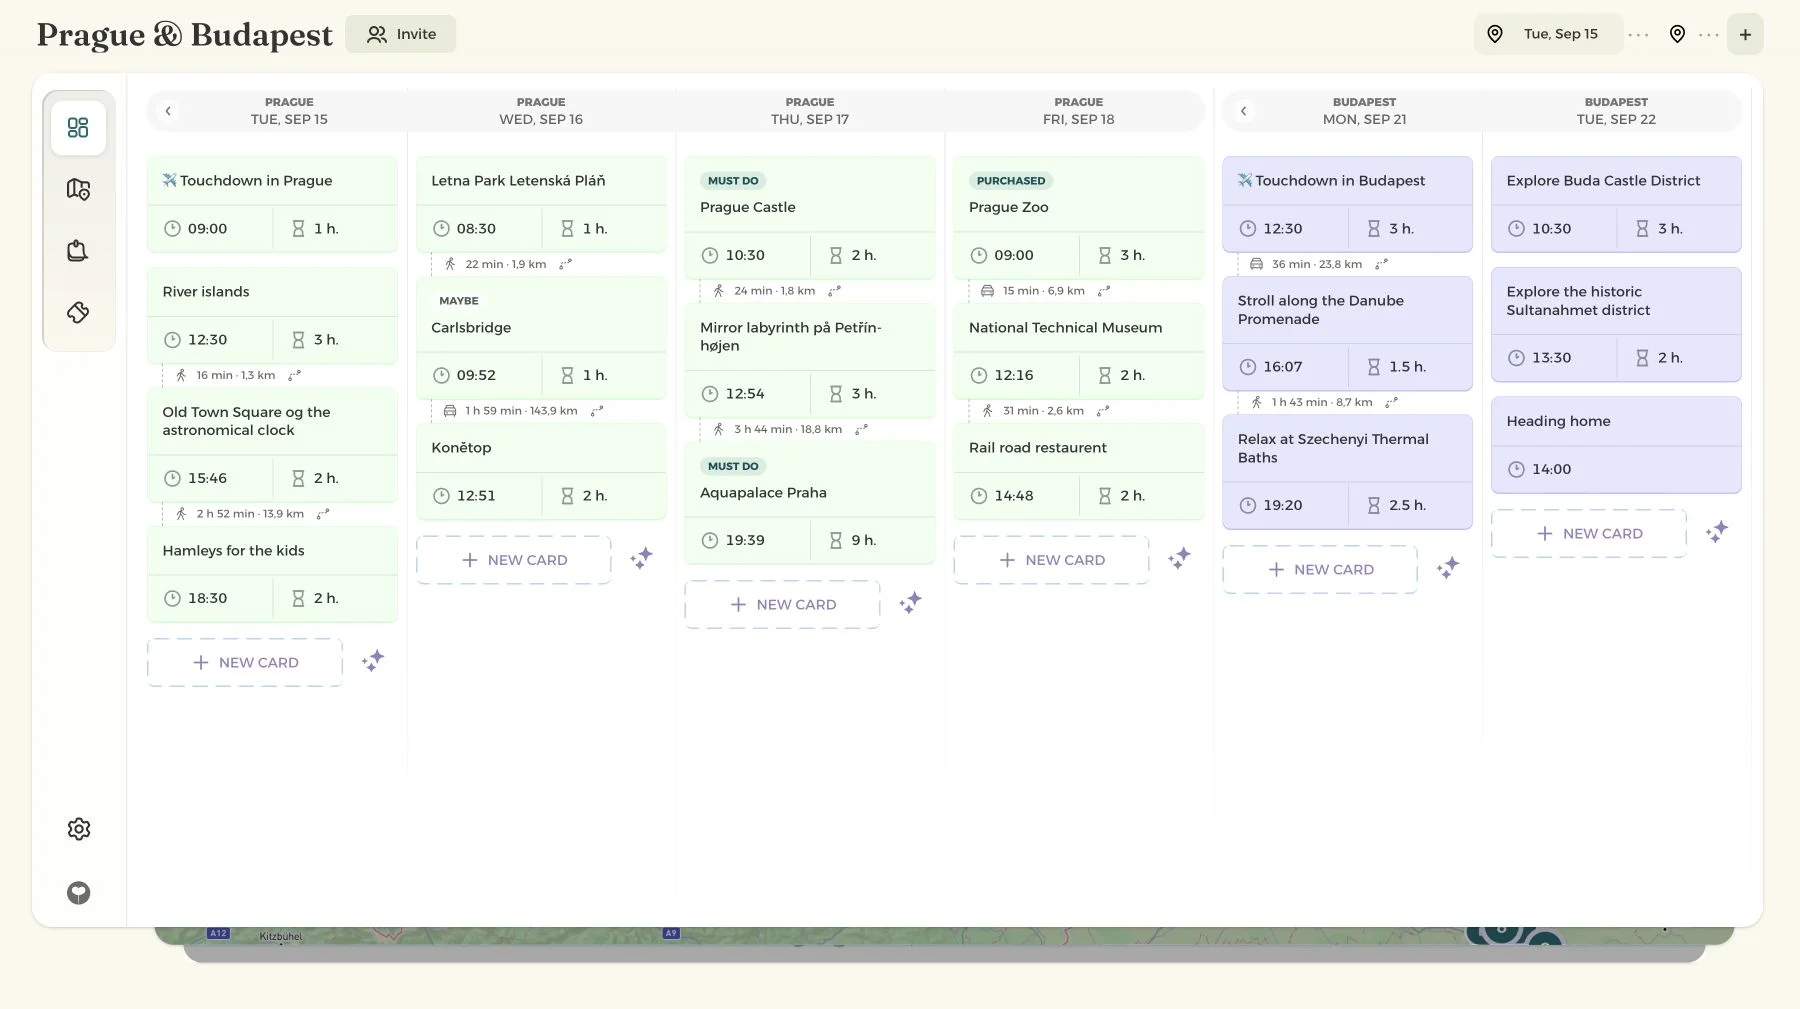
- Drag a card up or down to change its position within a day.
- Drag a card into another day to move the activity. Scroll across the board to reach later dates or another stop.
- Open a card and use its trash button if you no longer need it. On desktop, a trash target also appears while you drag a card.
Good to know Group nearby places before filling every hour. The map and travel times help you spot days with too much backtracking.
05 / Labels and colors
Make your must-dos easy to spot
Give the group a quick way to distinguish a firm plan from a possibility. Labels add meaning, while colors make the board easier to scan.
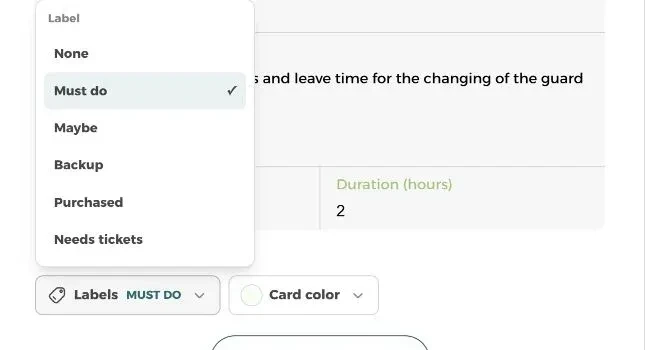
- Open a card and choose Labels.
- Pick Must do, Maybe, Backup, Purchased or Needs tickets. Choose None to remove the label.
- Choose Card color, select a color and save with Update. Agree on a simple color system with your travel companions.
Good to know Purchased is a planning label you set yourself. Adding that label does not buy a ticket or confirm a booking.
06 / Times and reservations
Build a schedule that leaves room to travel
Start times and durations turn a list of ideas into a practical day. Smart time can adjust flexible plans when the itinerary changes, while locked reservations keep their time.
- Open a card and enter its Start time and Duration (hours).
- Use Lock time for a fixed reservation, such as a timed museum ticket or a restaurant booking.
- Open Settings and turn on Smart time to adjust flexible times when you change the plan.
- Review the whole day after moving cards. Leave extra room for queues, breaks and anything that runs late.
Good to know Smart time and travel times are planning tools, not a promise that every activity will fit. A locked reservation remains fixed even when earlier plans run into it.
07 / Travel times
See how long it takes to get between places
Directions between cards show estimated travel time and distance for consecutive activities with locations. They help you plan the journey between the things you want to do.
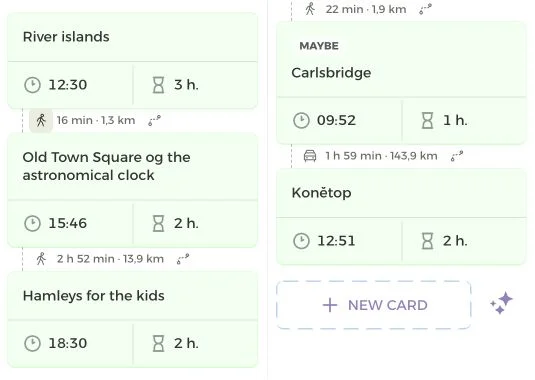
- In Settings, enable Directions between cards when planning access is available.
- Select the transport icon between two cards to choose Walking or Car, or hide that connection.
- Use the directions link beside the estimate to open the route in Google Maps.
- If no route appears, check that both cards have usable locations.
Good to know Estimates can change. Check live directions when you travel, and choose a transport mode that matches your actual plan.
08 / Trip ideas
Find ideas for the day you are planning
When a day is still empty, or needs one more good idea, describe what you are in the mood for. Trip ideas uses the destination and dates of the relevant stop.
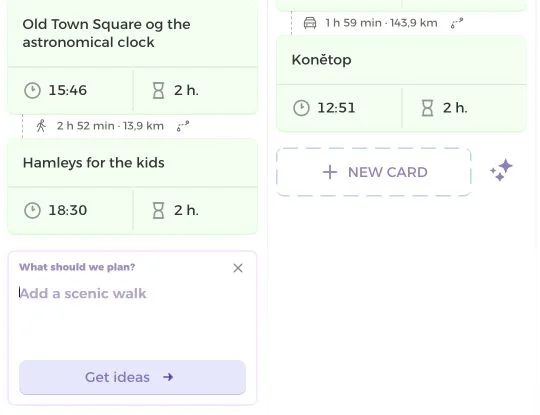
- Select the sparkle button, Trip ideas, below a day.
- Write a request such as “Find something free to do”, “Plan a relaxed day” or “Add a local food experience”.
- Select Get ideas. Review the cards added to your board, then move or edit them to fit the trip.
- Check locations, opening hours and ticket requirements before making a suggestion part of your final plan.
Good to know Be specific about interests, pace and who is traveling. If a suggestion has no location, select the correct place in the card before using it on the map.
09 / Map and nearby places
See your itinerary on the map
Switch from a list of plans to the places themselves. The map helps you understand where your activities sit in relation to each other, across every stop.
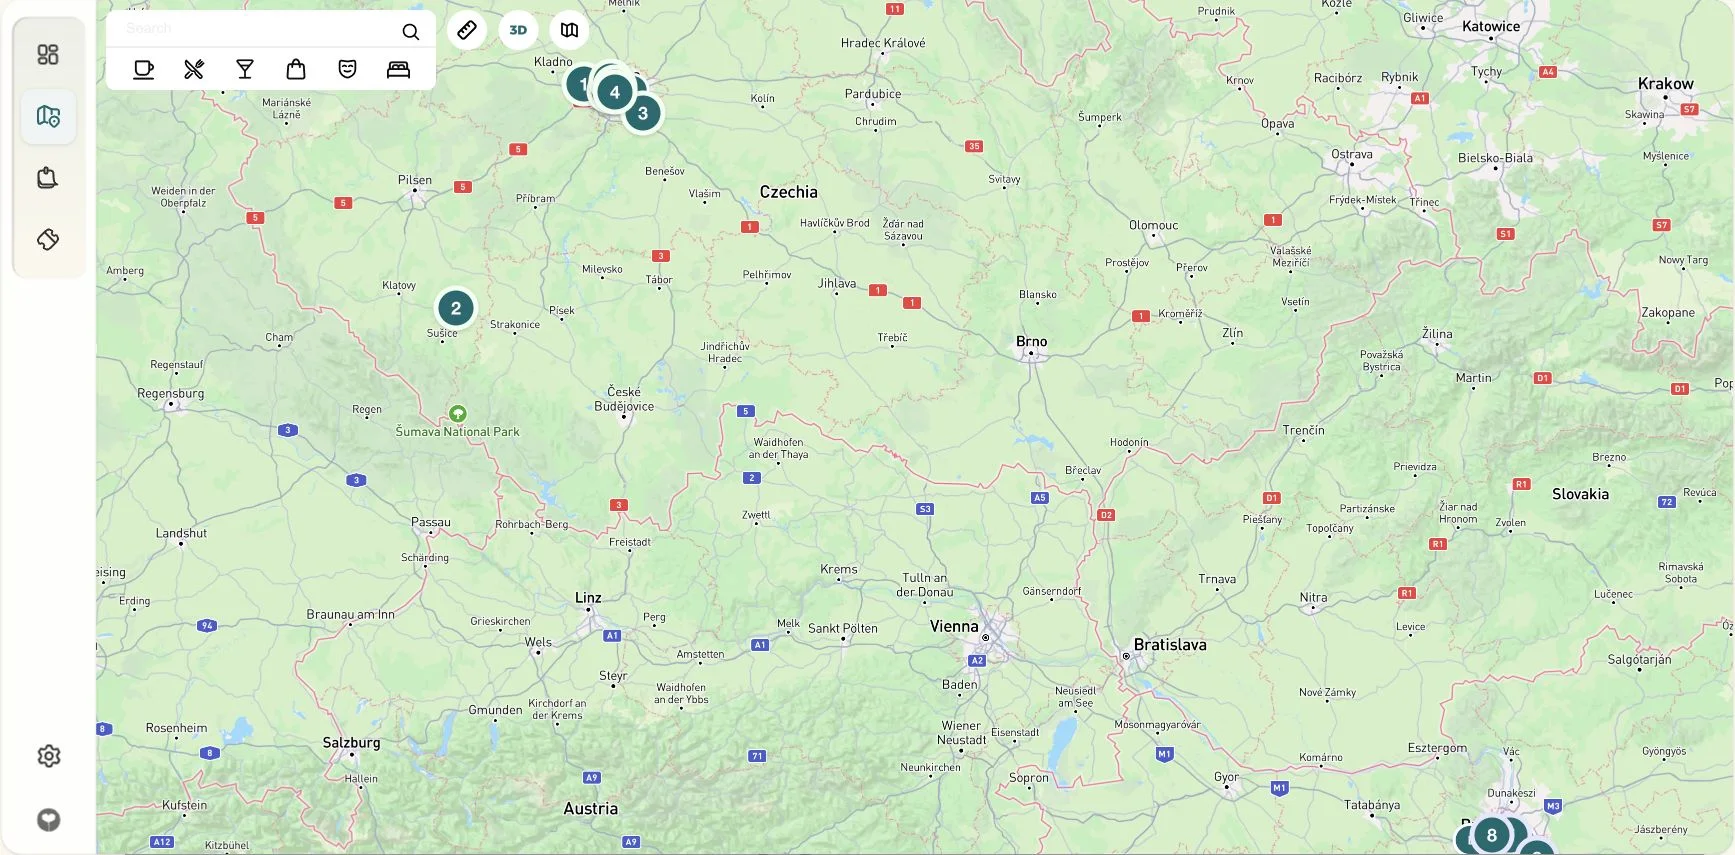
- Select Map in the workspace navigation. Cards with locations appear as markers.
- Search for a place, or use the category icons to explore coffee, restaurants, drinks, shopping, entertainment and hotels.
- Open a search result, choose the day and select Add to itinerary to bring the place onto your board. Move the map and use Search in this area to explore somewhere else.
Good to know If results are empty, try a more specific place name or a different area.
10 / Measure distance
Measure a walking route on the map
Check how far two places are apart before adding them to your day. The ruler follows a walking route and shows both the distance and estimated walking time.
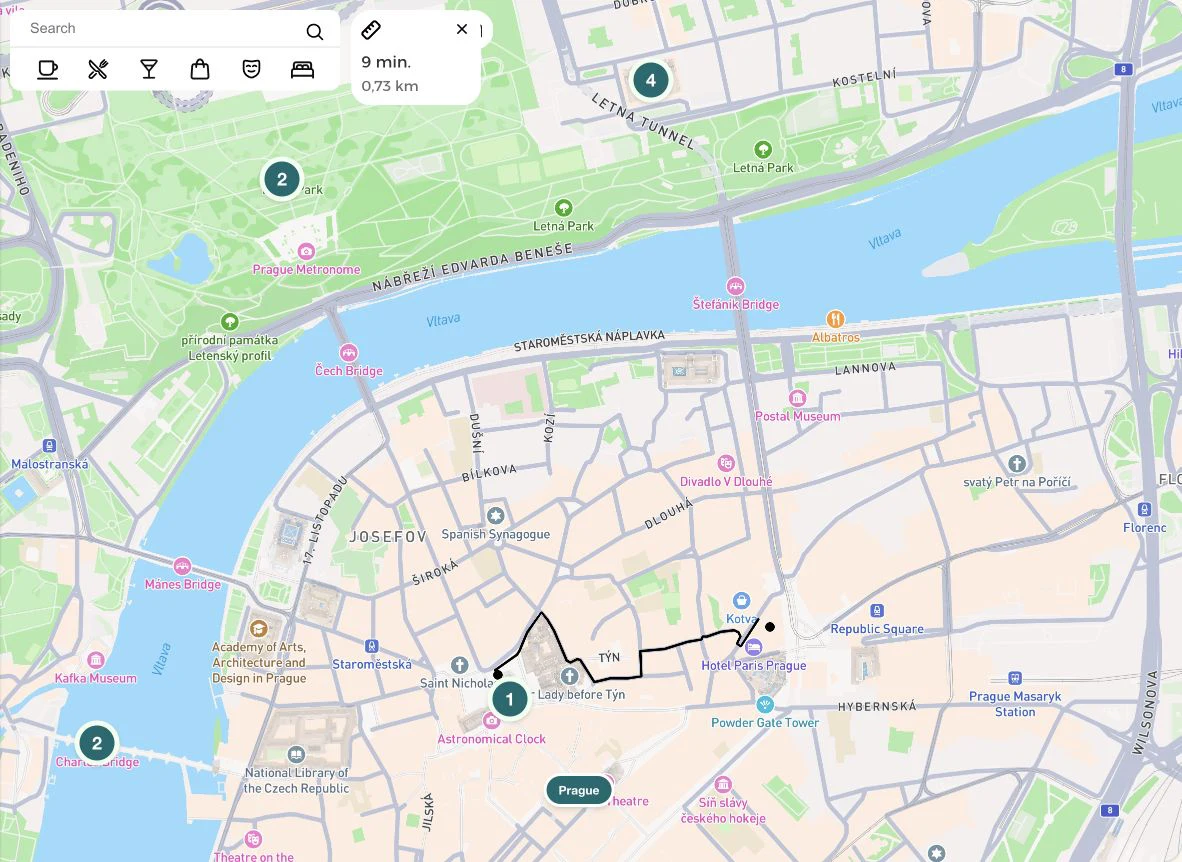
- Open Map and zoom in to the area you want to explore.
- Select the ruler button, Measure distance, then select a starting point and an endpoint on the map.
- Read the distance and estimated time beside the ruler. The line shows the walking route between your two points.
- Select another place to start a new measurement, or select an existing endpoint to remove it. Select the ruler again or its close icon to finish.
Good to know Distance measurement requires planning access. If Route unavailable appears, try points closer to walkable streets or paths. Allow extra time for stops and your own walking pace.
11 / 3D view
Explore buildings and streets in 3D
Get a closer feel for the neighborhood with a tilted map and three-dimensional buildings. Zoom in far enough to see the 3D detail around the places you plan to visit.
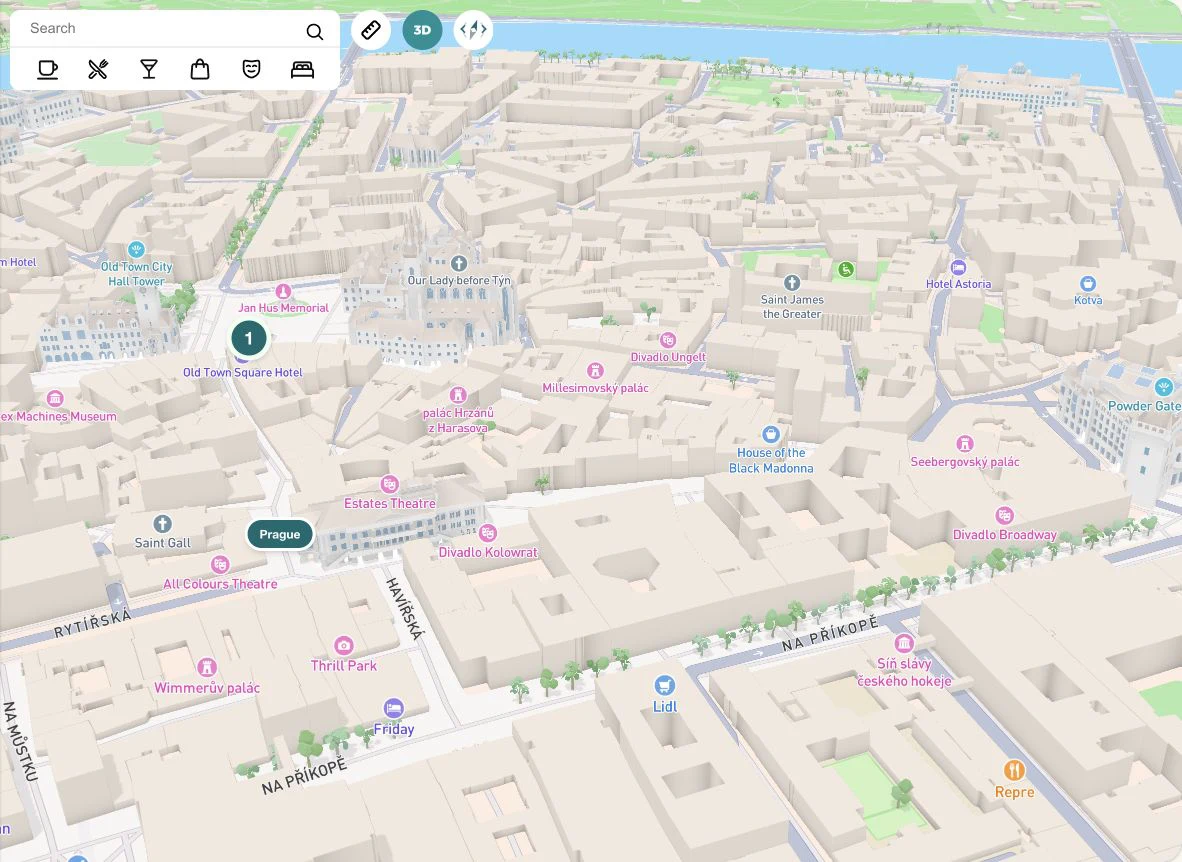
- Open Map and zoom in to a neighborhood or a few city blocks.
- Select 3D in the map toolbar. The map tilts so you can explore the area in perspective.
- If buildings still look flat, zoom in further. The 3D building view only works when you are zoomed in enough, and detail varies by location.
- Use the left or right side of the compass control to rotate the view. Select 3D again to return to the flat map.
Good to know Turning on 3D from satellite view switches back to the standard map. A wide city or country view will not show the same building detail as a close-up.
12 / Satellite view
See your surroundings in satellite view
Switch to satellite imagery to see rooftops, parks, rivers and the landscape around your itinerary. It is a useful way to understand what surrounds a place before you go.
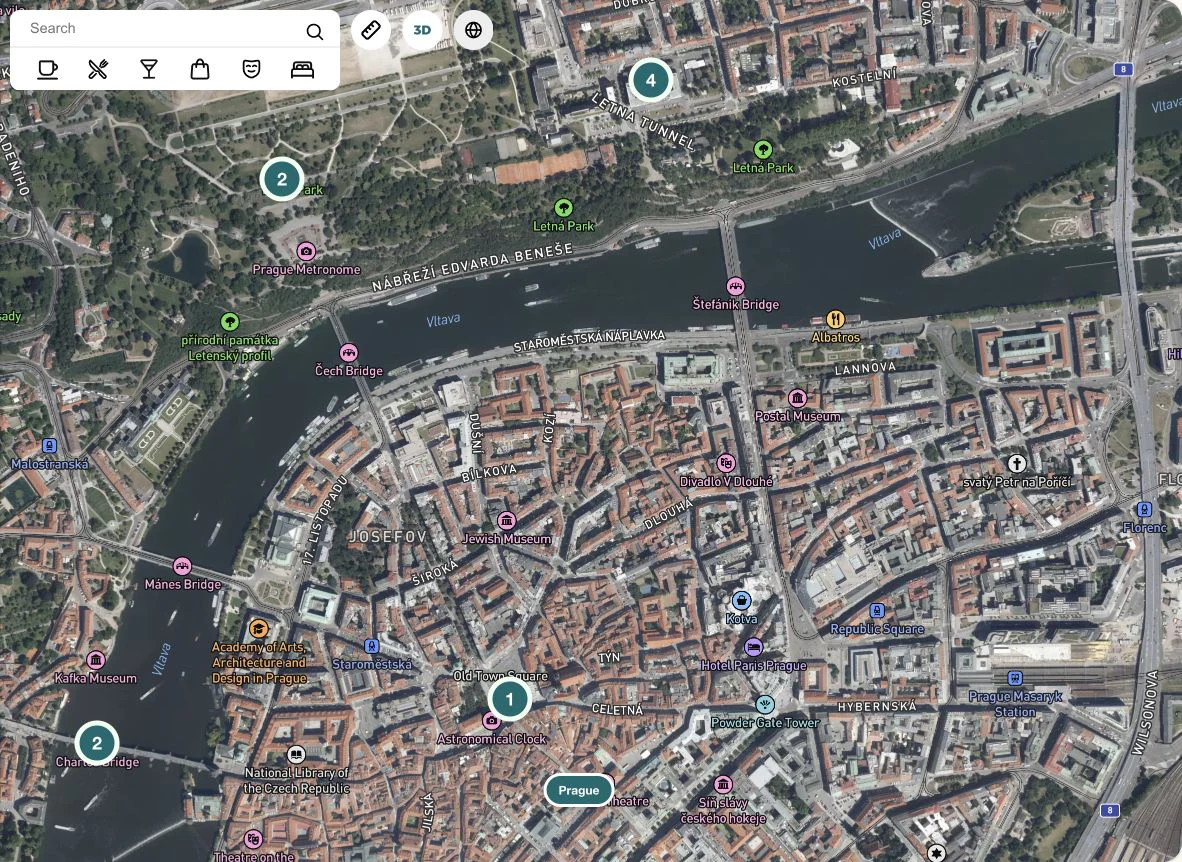
- Open Map. If 3D is active, select 3D to turn it off first.
- Select Change map style, the map icon beside the 3D button, to switch to satellite imagery.
- Pan and zoom to inspect the area. Your itinerary markers stay on the map.
- Select the same control, now shown as a globe, to return to the standard map.
Good to know Satellite imagery is not a live view. Use it for geographical context, and check current conditions and access separately.
13 / Things to do
Find tours and activities for your destination
Things to do brings bookable experiences into the planning workspace. Compare options and place them in the itinerary before deciding what to book.
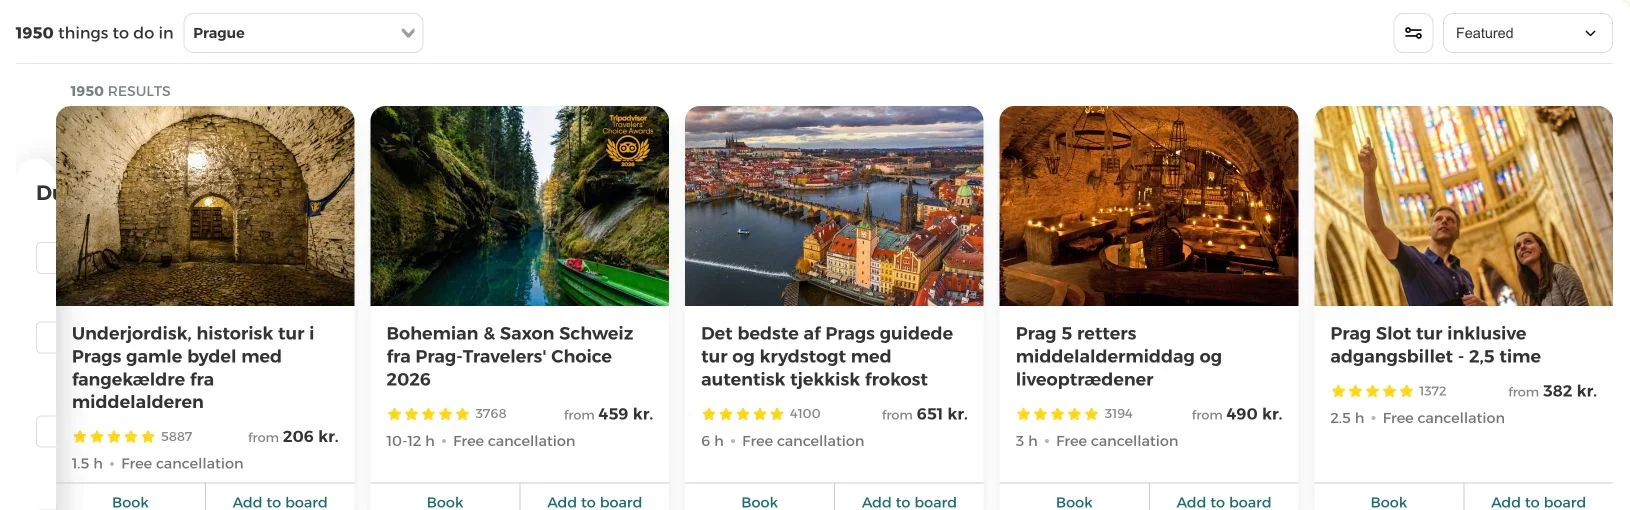
- Select Things to do and check the destination at the top of the list.
- Filter by duration, price or options such as free cancellation. Sort by price, traveler rating, duration or other available choices.
- Select Add to board to add an experience to your itinerary, then put the card on the right day.
- Select Book, or open Tickets on an experience card, to check availability and complete a booking with the provider.
Good to know Adding an experience to the board does not reserve it. Prices, language, availability and cancellation conditions come from the provider and may change.
14 / Trip notes
Keep the details that do not belong to one day
Some information belongs to the whole journey. Use Notes for a packing list, general reminders and practical details everyone needs to find.
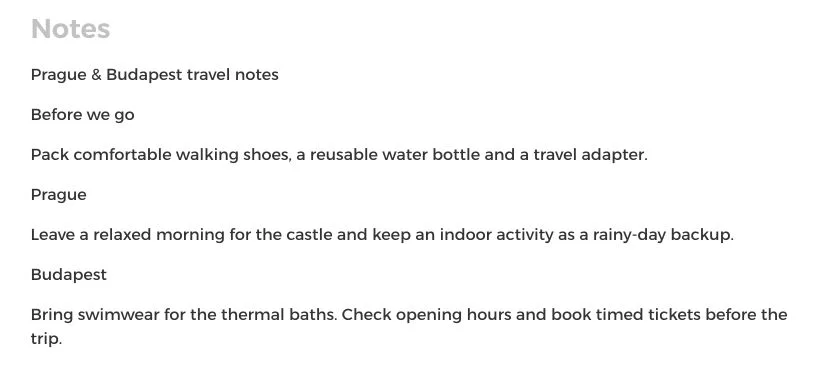
- Select Notes in the workspace navigation and start typing.
- Highlight text to reveal formatting options. Use clear headings and short lists to make long notes easier to scan.
- Add useful links directly to the notes. Keep activity-specific details on the relevant card.
Good to know The public sharing link hides personal notes. People with the edit or view link can see more of your trip, so choose the right link for the audience.
15 / Travel documents
Keep travel documents beside your plan
Store the files you want close at hand, such as a booking confirmation or a travel checklist, in the Notes workspace.

- Open Notes and find Upload travel documents at the bottom.
- Drop files into the upload area or select browse files. Document uploads require planning access.
- Wait for the upload to finish, then open the saved file to check it. Use the remove control if you no longer need it.
Good to know Supported uploads include PDF, Word documents and PNG, JPEG or WebP images, up to 50 MB per file. If an upload fails, check the file type, size and your connection before retrying.
16 / Share and collaborate
Plan together with the right sharing link
Select Invite to find three ways to share your itinerary. Your companions can open a shared board without creating an account or installing an app.
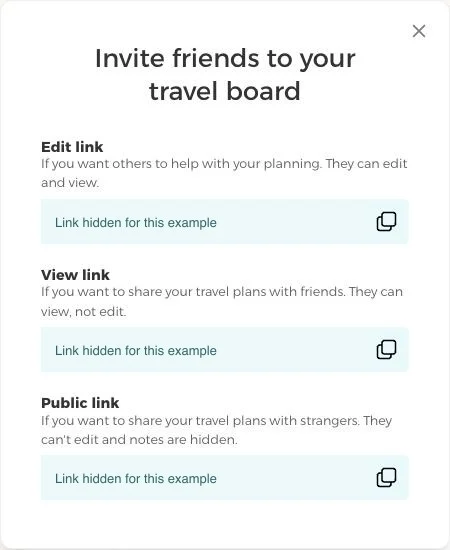
- Copy the Edit link for the people who are helping plan. Anyone with this link can change the board.
- Copy the View link for someone who should see the plan without editing it.
- Use the Public link for a version that cannot be edited and hides personal notes.
Good to know Treat the edit link like a key to your itinerary. Share it with your planning group, and use the public link when posting the trip more widely.
17 / Save and return
Find your trips again without hunting for a link
You can begin planning without signing up. Connecting a board to your email makes it easier to return to your trips from another device.
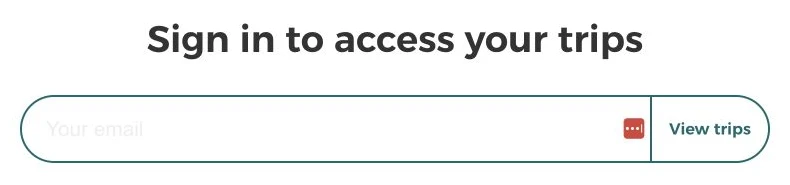
- Use Save your trip on an unclaimed board and complete the email verification steps.
- Open Your trips, enter your email and use the sign-in link sent to your inbox.
- Select a saved trip to return to its board. Your account also lets you update your username, sign out and manage your saved trips.
Good to know Keep the edit link somewhere safe until you have saved the board. If a sign-in email does not arrive, check the address and spam folder. An already claimed board must be managed through its owner’s account.
18 / Settings and access
Make the board work for your group
Settings keeps the shared planning preferences together. The selected units and time format apply to everyone on the board.
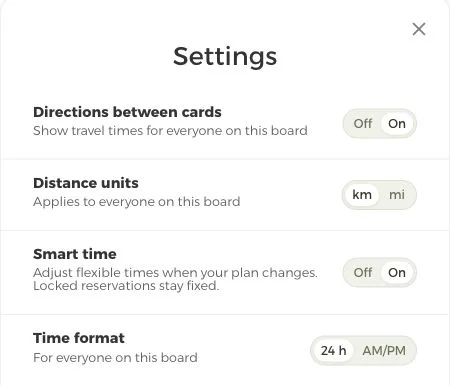
- Open the gear icon to access Settings.
- Choose kilometers or miles, and 24-hour time or AM/PM.
- Turn Directions between cards and Smart time on or off when planning access is available.
- Use the owner controls to manage or delete a board you no longer need. Review deletion prompts carefully.
Good to know New boards include paid planning tools for 48 hours from creation. After the trial, a one-time board upgrade keeps tools such as Trip ideas, travel times, Smart time, distance measurement and document uploads available. Your saved itinerary stays accessible in the free planner. Check the upgrade screen for the current price.
19 / Flights and travel extras
Connect your plans to travel services
Your itinerary can keep travel research close to the dates and places you are planning. Some suggestions depend on your route, dates and the information available from providers.
- Set the actual dates of your trip. After a date change, a flight suggestion may appear when suitable information is available.
- If you see Flight assist, open it to review the suggested route and nearby dates. Select Compare live prices to check current options with the provider.
- You can also add your own flight details as a normal card. Record the departure time and keep the booking information with your plan.
- The stop editor includes an AirHelp link for checking a disrupted flight with that service. Open the provider’s page to review its process and terms.
Good to know Suggestions are not bookings. Confirm dates, airports, baggage, prices and any service terms with the provider before purchasing.
20 / Discover and inspiration
Find a starting point for your next journey
You do not need a complete plan before opening Holihopper. Browse destination articles and trip inspiration, then bring the places you like into your own itinerary.
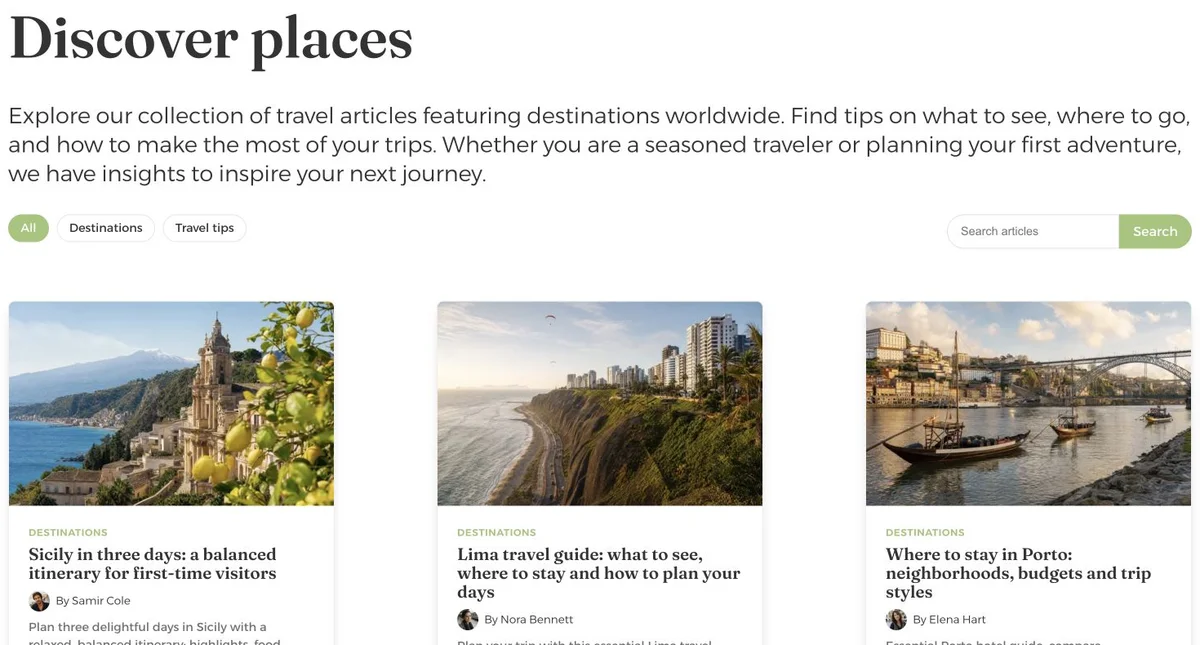
- Open Discover from the site navigation to explore destination guides and travel tips.
- Search articles or select a category to narrow the collection. Open an article to read the full guide.
- Visit Inspiration for more travel ideas. Use what you find as a starting point, then create a board for your own dates and interests.
Good to know Keep your plan personal. Choose the stops and pace that work for your group, and verify current details with each attraction or provider.
21 / Use it on your phone
Take the itinerary with you
Open the same board in your phone’s browser when you are out exploring. Your next stop, map and trip notes are still together.
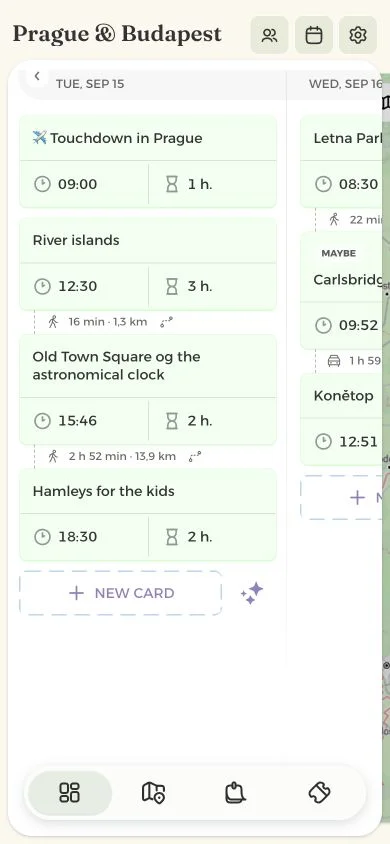
- Open your saved board or a shared link on your phone.
- Swipe across the day columns to see more of the itinerary. Use the bottom navigation to switch between Board, Map, Notes and Things to do.
- Use the calendar control to check stop dates, and open an activity card or its directions link when you need the details.
Good to know Use an internet connection for up-to-date plans, maps and searches. Keep essential tickets available separately if you expect to be without a connection.